Kurs: Single-cell RNA-seq data analysis with Chipster | csc

  • About the course

    Course contents

    In this course, you will learn how to analyse single-cell RNA-seq data using the Seurat single-cell tools integrated in the easy-to-use Chipster software. The exercises and course data are based on the Seurat guided analyses "Guided tutorial - 2700 PBMCs" and "Introduction to scRNAseq integration".

    This course contains two types of lecture videos: short lectures on each topic by trainers from CSC (ELIXIR-FI), and more in-depth lectures by Paulo Czarnewski (NBIS / ELIXIR-SE), Ahmed Mahfouz (LUMC / ELIXIR-NL) and Jules Gilet (ELIXIR-FR).


    You will learn the following topics, and how to perform these steps in the Chipster software:

    • UMAP plot showing how cells (dots) are clusteredperform quality control and filter out low quality cells
    • normalize gene expression values (with global scaling normalization and SCTransform)
    • scale data and remove unwanted sources of variation
    • select highly variable genes
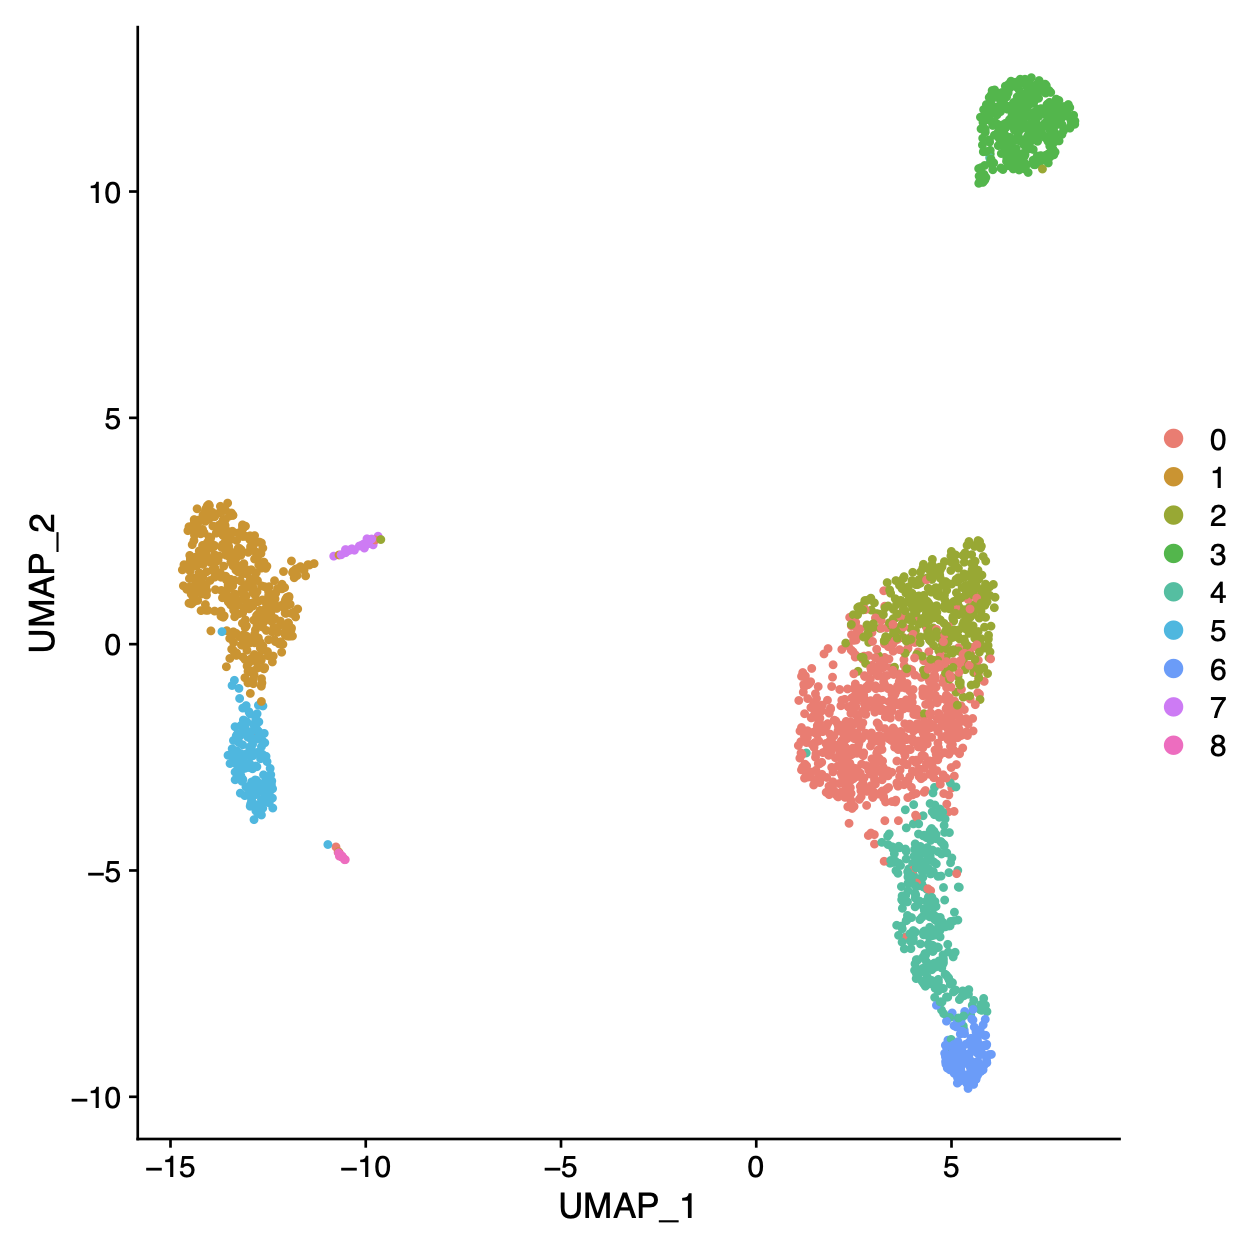
    • perform dimensionality reduction (PCA, tSNE, UMAP, CCA)
    • cluster cells
    • find marker genes for a cluster
    • annotate cells and clusters using a reference data
    • take a closer look at the Seurat objects
    • integrate two samples
    • find conserved cluster marker genes for two samples
    • find genes which are differentially expressed between two samples in a cell type specific manner
    • visualize genes with cell type specific responses in two samples

    "It is so nice to be able to do the whole workflow in Chipster, compared to the old model, where I had to transfer the tsv file to R-studio and run Seurat there. -- I learned how to use the Seurat tools in Chipster and what all the steps really mean. I learned to check the results after every step to adjust the next steps parameters and to test different PCA plotting tools. I also learned how to find different genes in the clusters and how to visualize them. I never got this far using the R-pipeline. " -Pinja, course participant & PhD student from University of Helsinki


    Learning objectives

    After this course you should be able to:

    • use the Seurat tools available in Chipster to undertake basic analysis of single-cell RNA-seq data
    • name and discuss the different steps of single-cell RNA-seq data analysis
    • understand the advantages and limitations of single-cell RNA-seq data analysis in general and in Chipster

    Keywords: Chipster, Seurat, single-cell sequencing, RNA-seq, clustering, aligning cells, cluster markers


    Links to material
    The relevant material is linked in each course section. Here are some quick links:


    Practicalities
    Each section of this course contains lecture videos, hands-on exercises and questions/tasks. The tasks can be used to confirm that you have reached the learning goals. You can use the Q&A Forum below to ask questions regarding the course topics or the exercises. Once you have finished all the tasks, you can download a course certificate with a unique course identifier. You can follow your progress with the progress bar on the right. The estimated time to complete the course is 2-3 days. In the certificate we recommend granting 1 credit (ECTS) for the course.  


    Help
    In practical matters, please contact event-support (at) csc.fi, and in content related questions, chipster (at) csc.fi. You can also join the Weekly CSC research user meetings in Zoom to discuss course matters and get help with the exercises.
  • Open all

    Close all

  • In this section, you will learn how to use the Chipster software, and where to find support and more information.

    Chipster is an easy-to-use graphical analysis software for high-throughput data such as RNA-seq and single-cell RNA-seq. Chipster contains over 450 analysis tools and a collection of reference genomes. Chipster runs on your web browser, and the actual analysis jobs use CSC's powerful cloud environment.

    You don't need to know about command line usage, R or Python to get started, and any laptop with a browser and decent internet connection will do. So to get started, all you need are credentials! If you are working, studying or otherwise affiliated to a Finnish university or research institute, you can log in to Chipster with your Haka or Virtu account, or request a CSC user account. If this is not the case, you can ask for a 3-week evaluation account or purchase a one-year user account to CSC's Chipster server. The Chipster server is also available for download as a virtual machine image free of charge. More information about getting Chipster user account.

    First, watch the Chipster 101 video and check the Chipster quick tour below

    (please give some time for the video to load in order to have a sharp image).


    Make sure that you have Chipster credentials to do the exercises.

    You can log in to Chipster with your Haka or Virtu account, or with your CSC account. You can also request a 3-week evaluation account.

    Next, please go through these exercises:

    1. Open Chipster: Go to https://chipster.csc.fi/, click on Launch Chipster and log in. 
    2. Open training sessionClick Sessions and select the session course_single_cell_RNAseq_Seurat under Training sessions.


    Finally, answer the quiz and question below.
  • This section provides an introduction to single-cell RNA-seq data analysis.

    You will learn

    • How does scRNA-seq work and what can go wrong
    • What is a UMI and why do we use them
    • Vocabulary: what are empties, doublets and dropouts
    • Why is scRNA-seq data challenging to analyze
    • What are the main analysis steps for clustering cells and finding cluster marker genes
    • What is Seurat

    First, watch the lecture video

    .

    If you have time, you can also watch a more advanced lecture by Jules Gilet (slides):


    Next, please complete these tasks:

    Task 1: We are using Seurat tools: check the Seurat webpage and the tutorials there.

    Task 2: What kind of scRNA-seq data do you have (10X Genomics, DropSeq, ...)? How is it produced (Google/ask)?

  • In this section we learn how to perform some QC and filter out cells from the input files.

    In this section, you will learn

    • What kind of input files can be used
    • What is the structure of 10X Genomics matrix file
    • How to filter out genes
    • How to check the quality of cells and filter out bad ones

    In the exercises, we start from a set of files that are the output of the 10X Genomics device. These files are converted into a Seurat object, which is passed from one tool to another: each tool adds something to the object. 

    First, watch the lecture video:    
     

    After watching the video, contemplate on the questions above.


    Next, please go through this exercise in Chipster:

    Set up a Seurat object and perform quality control

    Select the files.tar.gz. Select tool Single-cell RNA-seq / Seurat -Setup and QC. Check the parameters, and name your project PBMC. Run the tool.
    Open the QCplots.pdf in new tab. Check all the plots (there are several pages). You can also open the pdf in a new tab.

    Based on the plots, what would be the optimal upper limit for the number of genes expressed and mitochondrial transcript percentage? Hint: check the default parameters used in the tool Seurat -Filter cells, normalize, regress and detect variable genes. We will perform the filtering in Chipster in section 6.

    Finally, answer the quiz questions below:

  • In this section we learn about normalizing the data with global scaling normalization and SCTransform.

    In the first video you will learn:

    • Why do we need to normalize gene expression values
    • What is a dropout
    • What does global scaling normalization do and when does it not work well

    Please watch the lecture video:

    The second lecture video covers an alternative normalization method, SCTransform. You will learn:

    1. When SCTransform is better than global scaling normalization
    2. How SCTransform works
    3. What analysis steps SCTransform takes care of 
    4. What you need to remember in subsequent analysis steps if you have normalized with SCTransform

    Please watch the second lecture video:


    After watching the videos, contemplate on the questions above. We will perform normalization in Chipster in section 6.

    Finally, answer the quiz questions below:

  • In this section, we learn about the variance in the data and how to find the highly variable genes.

    In this section, you will learn

    • Why do we need to find highly variable genes
    • What kind of mean-variance relationship is there in scRNA-seq data
    • Why do we need to stabilize the variance of gene expression values

    First, watch the lecture video:

    After watching the video, contemplate on the questions above. We will perform the detection of highly variable genes in Chipster in section 6.

    Finally, answer the quiz questions below:

  • In this section we learn about scaling the data and removing unwanted sources of variation.

    You will learn

    • Why do we need to scale data prior to PCA
    • How is scaling done
    • How can we remove unwanted sources of variation

    First, watch the lecture video:

    After watching the video, contemplate on the questions above.

    Next, please go through this exercise in Chipster:

    Filter cells, normalize expression values, scale data and regress out unwanted variation, and detect variable genes

    Select setup_seurat_obj.Robj (this is an R-object, which can be exported and opened in R, or just passed to the next tool in Chipster, like we do now). Select the tool Single-cell RNA-seq / Seurat - Filter cells, normalize, regress and detect variable genes. Check if the default parameters are good for this dataset, based on the QCplots.pdf. While the tool is running, click More info... and read about the four steps this tool performs.
    Once the analysis is ready, open the Dispersion_plot.pdf and check also the second page.

    How many cells were filtered out? What are the ten most highly variable genes?

    Bonus: How to regress out variation caused by cell cycle stage?

    Please watch the following video about regressing out the cell cycle stage:


    You can test this option by re-running the tool also with the cell cycle stage filtering option on (for the setup_eurat_obj.R object) if you like.

    Finally, answer the quiz questions below:

  • In this section, you will learn about dimension reduction (PCA, tSNE, UMAP) and selecting the principal components for the clustering step.

    The data has multiple dimensions, as there can be thousands of cells and thousands of genes. This would make the data tricky to deal with, which is why dimension reduction step is needed. We reduce the dimensions to ease the clustering step, and also to make the visualisation of the data possible.

    First, watch the theory lectures about dimensional reduction:


    For more theory, you can view this lecture video and slides by Paulo Czarnewski (NBIS, ELIXIR-SE):


    Next, do the following exercises in Chipster:

    Principal component analysis
    Select seurat_obj_preprocess.Robj from the previous step and run the tool Single-cell RNA-seq / Seurat -PCA. Open PCAplots.pdf. Look at the heatmaps and the standard deviation of PCs in the last two pages.

    How many principal components should we continue the analysis with (check the elbow in the standard deviation plot, inspect the heatmaps)? Would 10 be ok?


    Finally, answer the questions in the quiz:

  • In this section, you will learn about clustering of the cells, and finding and visualising cluster marker genes.

    We want to know what kind of cells are present in our dataset, so we cluster the cells, and study the similarities in expression within these clusters. Clustering is not a simple task! Luckily the Seurat tools wrapped in the Chipster's clustering tool will take care of it, but it is good to understand what happens under the hood.

    First, watch the lecture video about clustering:


    For more theory, you can also watch this lecture video and slides by Ahmed Mahfouz (LUMC, ELIXIR-NL):


    Once we have clustered the cells, we can look for marker genes for these clusters. In this section you will learn

    • What is a marker gene
    • What aspects of scRNA-seq data complicate differential expression analysis
    • Why do we want to filter out genes prior to statistical testing

    Watch the lecture on detecting marker genes for clusters


    After watching the video, contemplate on the questions above.

    Next, do the following exercises in Chipster:

    1. Clustering

    Select seurat_obj_PCA.Robj from the previous step. Select tool Single-cell RNA-seq / Seurat - Clustering. In the parameters, set Number of principal components to use = 10.

    While waiting for the tool to run, you can study the manual (click "More info..." to access the manual page).

    What are the two main steps of this tool?

    When the results are ready, inspect the clusterPlot.pdf. How many clusters are there in this data?

    2. Marker genes for clusters

    Select seurat_obj_clustering.Robj from the previous step and the tool Seurat v4 -Find differentially expressed genes between the clusters. In the parameters tab, set the parameters as indicated below, and run the tool.

    • Find all markers = FALSE
    • Cluster of interest = 3 (note, we want to select that one "lonesome" cluster far away from the others -if you used some different parameters in previous steps, please note that cluster number might be different!)
    • Limit testing to genes which are expressed in at least this fraction of cells = 0.25  

    Open markers.tsv as spreadsheetHow many marker genes were found for cluster 3? What are the top two marker genes for this cluster? 

    Let's check which markers show higher than 4-fold difference in expression between cluster 3 and all other cells. Select markers.tsv and run the tool Filter table by column value from the Utilities category using the following parameters:

    • Column to filter by = avg_log2FC
    • Does the first column lack a title = yes
    • Cutoff = 2 (why do we put 2 here if we want a 4-fold difference?)
    • Filtering criteria = larger-than

    How many genes do you get?

    3. Visualize markers

    Choose seurat_obj_clustering.Robj  generated in the step 2. Select tool Single-cell RNA-seq / Seurat -Visualize genes. Type marker gene names in the parameter field (try for example MS4A1, LYZ, PF4). You can enter several gene names at the same time, separated by comma (,). Set the parameters:

    • Add labels on top of clusters in plot = yes 
    • Plotting order of cells based on expression = yes
    • Give a list of average expression and percentage of cell expressing in each cluster = yes

     Open the biomarker_plot.pdf.

    Is any of your genes a good marker for cluster 3? Are the genes you selected good markers for other clusters (check both the plots and the tables)?

    Finally, answer the questions in the quiz.

  • In this section, you will learn about extracting information from Seurat object.

    In this section, you will learn

    • How is the information stored in the object
    • How to access specific data slots inside the object

    First, watch the lecture video about extracting information inside Seurat object:


    After watching the video, contemplate on the questions above. 

    Next, please go through this exercise in Chipster:

    Extract information from Seurat object

    Select seurat_obj_clustering.Robj. Select the tool Single-cell RNA-seq / Seurat v4 -Extract information from Seurat object

    When the results are ready, inspect the slots.txt. How many genes and cells are there in this data?

    Finally, answer the questions in the quiz.


  • In this section, you will learn how to annotate the cells and clusters in your data using SingleR tool and CellDex reference datasets.

    After clustering, we want to know what kind of cells the clusters consist of. One way is to look at the differentially expressed genes between the clusters, and based on those and known cell type biomarkers to label the clusters manually. Another approach is to compare the cells to a reference dataset with cell type labels. In Chipster, we offer SingleR tool and CellDex references for this purpose. 

    First, watch this lecture video about SingleR annotations:


    You can also check the manual for SingleR.

    Next, do the following exercises in Chipster:

    1. Annotate clusters

    Choose seurat_obj_clustering.Robj generated in the clustering step. Run tool SingleR cluster annotation.

    Open singleR_annotations_plots.pdf and see how the clusters are annotated. What are the cells in cluster 3 (the cluster that is far from the other cells)? When annotated cluster-wise, do some clusters get the same label? Does the cell-wise annotation reveal more about those clusters? Looking at the heatmap, do some labels look more similar to each other? 

    2. Rename clusters

    Select again the seurat_obj_clustering.Robj and rename_clusters.tsv file (given together with the original input tar file, so you can find it most likely at very top of the workflow view, or you can use the "Find file" option) which contains the manually picked cluster annotations based on marker genes from the Seurat vignette. Check that the files are correctly assigned. Run the tool Seurat v4 -Rename clusters and open the result file clusterPlotRenamed.pdf.  How well do these annotations match with what you got from SingleR in the previous exercise (that is, do the automatic SingleR annotations agree with the labels given by the Seurat developers)?

    Finally, answer the questions in the quiz.

  • In this session we demonstrate the use of Seurat tools for joint analysis of two samples. The session uses the same data and follows the steps in Seurat tutorial for integrated analysis

    The tools in Chipster do allow analysis of more than two samples as well. To see how this is done, see example session "02_single_cell_seurat_covid_6samples".

    Now, however, we begin with two expression matrixes: one for control PBMC cells, and another for PBMC cells stimulated with interferon beta. So now the cells will cluster based on cell type, but also based on the treatment, which makes the analysis a bit more complex. 

    We wish to: 

    • Identify cell types that are present in both datasets 
    • Obtain cell type markers that are conserved in both control and stimulated cells 
    • Compare the datasets to find cell-type specific responses to stimulation

    The first steps of the analysis are already familiar to us. After we have preprocessed both samples, we combine them, perform the integrated analysis, find markers for samples and for clusters, and visualise these.

    The process of integrating samples is described in more detail in Methods section in the paper by Stuart*, Butler*, et al., Cell 2019. (You can access the paper in bioRxiv)

    Please watch the video for introduction to two sample analysis:


    We are switching to another dataset and another Chipster session, with two samples.

    Please go through these exercises:

    1. Open example session
    Click Sessions and open training session course_single_cell_RNAseq_Seurat_integrated.

    2. Setup Seurat object & quality control
    Select the immune_control_expression_matrix.txt.gz. Select tool Single-cell RNA-seq / Seurat -Setup and QC. Check the parameters, and name your project as PBMC_CTRL and your sample as CTRL. You can give a bit stricter parameter for filtering (genes expressed at least in 5 cells for example). Make sure that you have assigned the file correctly: this is a digital expression matrix (DGE table) in tsv format. Run the tool.
    Repeat this step for the immune_stimulated_expression_matrix.txt.gz, except now name the sample as STIM. Naming the samples at this point is very important!
    How many cells are there in this dataset? Do you notice anything odd?

    3. Filtering, regression and detection of variable gene
    Select both setup_seurat_obj.Robj objects. Select the tool Single-cell RNA-seq / Seurat - Filter cells, normalize, regress and detect variable genes. Adjust the parameters so that you are filtering out cells that have less than 500 genes expressed, and run the tool ("Run Tool for Each File"). 
    Once the tool is done, open the Dispersion_plot.pdf files.
    How many variable genes are there? Are the most variable genes similar in the two samples? Do you think the filtering parameters we used here work well for this data?

    4. Combine two samples

    Select both seurat_obj_preprocess.R objects from the previous step and run the tool Single-cell RNA-seq / Seurat –Combine multiple samples -this time only once, so choose the option "Run tool (1 sample)".


    Please watch the video for aligning multiple samples and clustering:


    For more theory, you can view the lecture video by Ahmed Mahfouz (slides):


    Then go through these exercises:

    5. Integrated analysis of two samples

    Select the seurat_obj_combined.Robj from the previous step. Run the tool Single-cell RNA-seq / Seurat –Integrated analysis of multiple samples with default parameters.

    While waiting, you can study the manual (click More info...). What are the main steps of this tool?

    When the results are ready, study the integrated_plot.pdfHow many clusters are there in this data?


    Please watch the video for finding differentially expressed genes and conserved cluster markers:


    Then go through these exercises:

    6. Find conserved cluster markers and DE genes in two samples
    Select the seurat_obj_combined_integrated.Robj from the previous step. Run tool Find conserved cluster markers and DE genes in multiple samples for a cluster of your interest (for example, cluster 3). Inspect the tables generated by the tool.
    What was used as a cut-off for the adjusted p-value?
    How many differentially expressed genes were there between the two samples in this cluster? Write down few interesting genes from the list for the visualization exercise 7.
    How many conserved biomarkers were recognized for the cluster? Write down few interesting genes from the list for the next tool.

    7. Visualize markers and differentially expressed genes
    Choose seurat_obj_combined_integrated.Robj generated in step 5. Select tool Single-cell RNA-seq / Seurat - Visualize genes with cell type specific responses in multiple samples. Type the gene names to the parameter field (the ones you listed in previous step, or try for example: CD3D, GNLY, IFI16, ISG15, CD14, CXCL10). Use comma (,) as a separator. You can run the tool several times for different gene lists.
    Open split_dot_plot.pdf.
    Are the differentially expressed genes expressed differently also in other clusters? Are the conserved markers expressed in other clusters? 


  • "Examples are always easier" 

    Now it's time to test what you have learned and analyse your own data! Try analysing some of your own data in Chipster, find some interesting data online, or try starting from the digital expression matrix that is the end result (the digital_expression.tsv file) in example session course_single_cell_RNAseq_DropSeq_done. Don't be scared to face some new issues and try different things -this is an effective way to learn! 

    "Beginning is always the most difficult step" 

    Anyone who has analysed some data will tell you the same: cleaning and tuning your data in the very beginning is the most time consuming step. So don't get frustrated! We try to make it as easy as possible, but it's good to practise this as well, as this is often a step that is skipped in course sessions.
    • Read carefully the manual page for the Setup toolNote that if you find some data for example from GEO, it is likely in some matrix format, and will work as a digital expression matrix -note however, that there shouldn't be any extra columns, rows etc, and that it should be in the tab separated (.tsv) format. 
    • Don't be shy to ask! You can send a support request in Chipster (recommended) or send e-mail to chipster (at) csc.fi
    Your final course task

    After toying around with your data, we would like to see what you came up with! In very free format, please share some of your reports, a print screen of your sessions workflow (keeping in mind that others can see what you are sharing, so no sensitive data obviously), and discuss the following questions:

    • What was different compared to the exercises?
    • What kind of decisions you had to make? 
    • Was there something you were not able to do? 
    • Any error messages you managed to tackle?

  • Congratulations on completing the course! 

    You can download the course certificate from the link below, after you have finished all the sections, including giving course feedback, and the tasks/quizzes.

    We are actively developing both the course contents as well as Chipster software, so please 

    • give us feedback (you can find the link below) 
    • write your thoughts on Chipster in the forum below.

    Need help?

    • If you have any questions or you need support with Chipster, feel free to e-mail us at chipster@csc.fi
    • Practical/technical questions regarding the course can be sent to event-support@csc.fi

    Accessing the course materials after the course?

    • We hope to develop our training material and documentation! Please give feedback of the course. Filling in the feedback form linked here is required to complete the course.